Optimization and Deployment of Vue App on Firebase
Learn how to optimize code for scalable deployment of Vue app on firebase with best practices.

Self-Taught 👩🏽💻|CSS Ninja🐱👤| Frontend Enthusiast 💻| Multilingual 😛|| Public Speaker || I React with Vue on a Stack called Frontend || My Type of code are always in Script
Introduction
Optimizing apps and deployment is a crucial task that an average engineer should be capable of apart from running an app on a local address like 8080.
That is normal during development, but ultimately your goal may not be to have your application running locally on your machine, but you may want to deploy it and bring it to live on a live server for others to use.
In this article, You will learn how to deploy and optimize VUE apps from development to production.
You will learn
What deployment means
What to deploy
Learn optimization techniques with examples
Prerequisites
- Basic Vue js knowledge
Table of Content
Introduction
What is deployment? and what to deploy.
Optimizing your code.
Creating deployable Resources
Deploying Vue App.
What is deployment?, and What to deploy.
Deployment is the process of installing, configuring, updating, and enabling one application or suite of applications that make an app available.
Let's always note that Vue js runs in a browser. Any website is loaded with a browser, but the Vue app is driven by browser-side javascript code.
All the code is written and transformed by the project setup and converted into javascript code, which our browser understands, so what is seen on the screen is loaded from a server but rendered on the screen by Vue.
NOTE: " I am emphasizing this because this influences how a web app/website is deployed.
Since our Vue app is made up of:
HTML (just one HTML file named index)
CSS (often seprated )
Javascript (default javascript file built by Vue project setup)
These are the files we have with no code to run on the server. Therefore we have a static web app/website and hence a static website hosting provider is all we need.
Some of the static hosting providers include:
Optimizing your code.
After building your app and before pushing your code to production, you have to finalize and polish your code and make sure it's optimized. Code optimization involves actions like
Testing your code: Testing for errors and different scenarios and finding possible errors in the code and fixing them.
Refactor your code: Don't repeat yourself too often. Create reusable code and have less code. (The less code you have, the less code the app user have to download before the app load on the screen, Less code means a faster website)
Consider using the "asynchronous components approach": There are certain components we don't need when every time our application is loaded. This means that only the code that will be used at a certain moment will be downloaded using the Vue defineAsyncComponent method.
Creating deployable Resources
After optimizing the project by fixing all the errors, refactoring the code, and adding asynchronous components.
Now it's time to upload the Vue project to some static host.
Let's differentiate between two kinds of projects.
If you have a very simple project, we really may just have a couple of customs HTML, CSS and JS files. and we have no project setup created by the Vue CLI or anything like that. In that case, we can grab such files and upload them onto a server
If the project has a bit more complexity typically created with the Vue CLI, then there will be more steps. You have to optimize your code as discussed in the Optimizing your code section and then you need to build your project. Building your project may even optimize your code for you automatically the more.
Building your code is required because the raw code in your project with all those file extensions (.vue), and that is not the code the browser would understand, that is the code that needs to be transformed into regular javascript code first and the CLI-created projects have a built-in script, which you can execute, which will do the transformation.
Only once you've got that built and optimized code, only then will you have a couple of files that are generated for you which you can then take and upload unto a server.
We will be focusing on the second kind of project which is the complex project build with the Vue CLI.
So let's build the project. To build a project generated with the Vue CLI, we will have to execute it. In the package.json as shown below, you will see all the scripts you can execute.

Now we will be using the build script to build the production application and optimizes it for production by running the:
"npm run build"
This will bundle all our code into one big app file and the smaller chunk files for the async components and will transform the code into a code the browser can understand and optimize it.
When this finishes you will find a disk folder inside the project the dist folder now contain the single page and a javascript folder with all the code chuck highly optimized to javascript code and the CSS folder with the generated CSS files all minify and optimized to take up little space as possible.
It's the content of the dist folder that is needed to be uploaded to the static hosting server.
Deploying Vue App.
So, we are done optimizing and building our app now let's deploy our app. As said earlier there are different platforms for static hosting which include: AWS, Firebase, and Netlify hosting.
In this article, we will be using firebase hosting.
Visit the firebase console and register an account (if you don't have one)

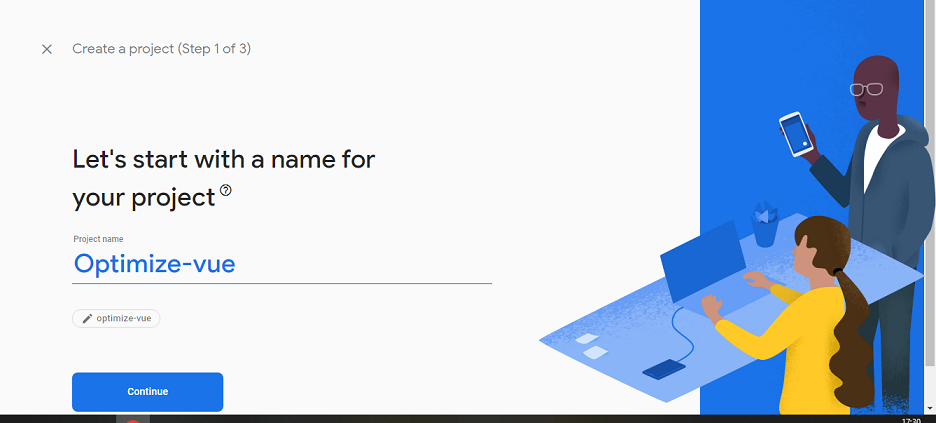
Create a new project and use the setup wizard (you can skip in if you already have a project setup)
Click on the build collapse menu on the left side navbar.

Click on the get started button to start the setup wizard.

Install the firebase and click on next when the fire-base tool finishes installing
npm install -g firebase-toolsNow at this stage, we need to login by running
firebase loginLogin with the credentials that you use to login into your firebase account if you are not logged already
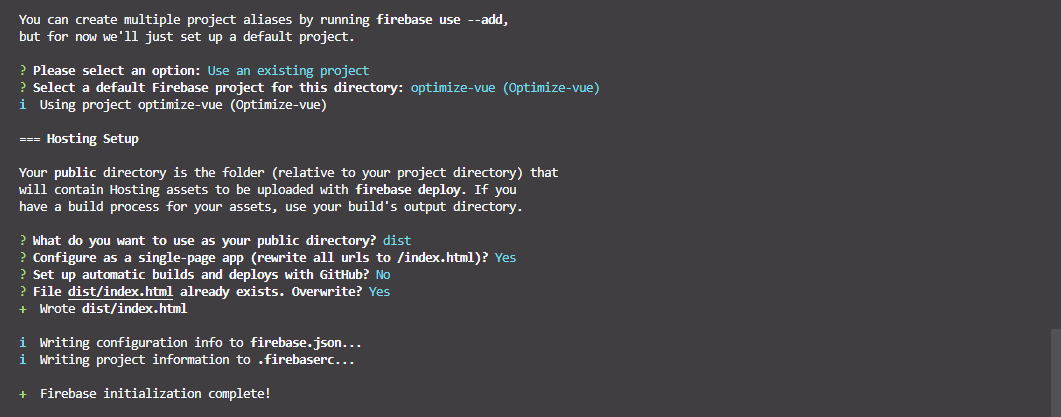
Once that is done, you need to run the "firebase init" in your terminal, this will ask you a couple of questions about which part of the firebase you want to manage with the command.
For this article, we will be using hosting because that's what we want to do. So select hosting by navigating with the arrow keys and press space to mark it and then press enter.
Since we have already created a project we can select the "existing project" options and select the project we created earlier.
Important:
Firebase will ask for the public directory. This is important because this is the directory where the files that will be uploaded are loaded. Remember that our build app is located in the dist folder.
You can now type dist and press enter Firebase will ask you whether it should be configured as a single-page app. since we're deploying a single-page app we type
"YES"
so that always it's the index.html that will be served Firebase may ask if you want to overwrite your file we select "No" because we want to keep your files. Now that firebase has been initialized.
NOTE:
Never touch the code which is generated from the build which is located in the "dist" folder, instead, edit the unbuild code and run the build script command again.
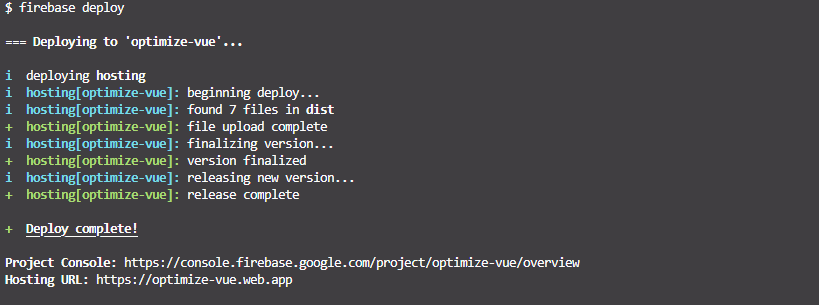
Lastly, our build app is ready for deployment, following the firebase setup wizard we can now type the "firebase deploy" command to deploy our app which will take the code and upload it to firebase.
firebase deploy
Once it is finished deploying firebase will generate the deployed link which will be used the access the app.
Congratulation!, you have just build deployed and deployed an optimized and standard production code.
You can go back to your firebase console and make some changes such as adding a custom domain.


